How to Choose a Red Dot Sight: MOA, Battery Life and Mounting Explained
How to choose a red dot sight without wasting money: MOA dot sizes explained, real battery life numbers, co-witness heights, pistol footprints and torque specs.
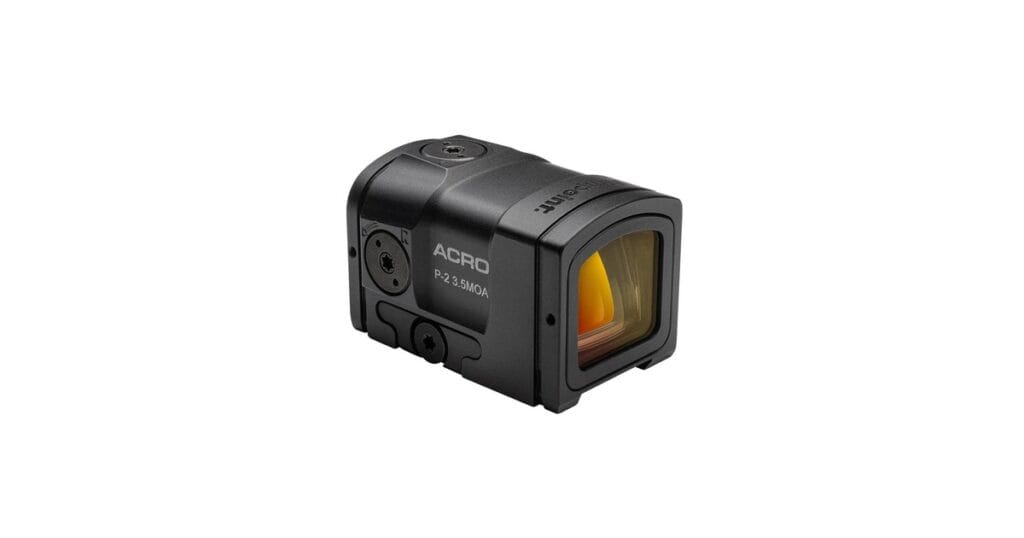
Working out how to choose a red dot sight is mostly a matter of answering four questions in the right order: what type of optic suits the gun, how big the dot should be, how the sight is powered, and how it mounts. Get those right and almost any reputable optic will serve you well.
Get them wrong and how to choose a red dot sight becomes an expensive lesson: a sight that sits too low, runs out of battery in a drawer, or puts a dot on the target that is too coarse for the shooting you actually do. Here is the decision path, in order.
How to Choose a Red Dot Sight: Start With the Optic Type
The first step is matching the optic family to the gun it will live on. Three families dominate the market, and they suit different roles.
- Open emitter reflex sights. A single lens with an exposed LED projecting onto it. Light, compact and inexpensive, and the standard choice for pistol slides and small carbines. The trade off is that the emitter well can collect rain, snow or lint and dim the dot.
- Enclosed emitter sights. The emitter sits inside a sealed housing with glass at both ends. Heavier and pricier, but immune to the debris problem. The natural pick for a duty pistol or a rifle that lives outdoors.
- Tube sights and holographic sights. Tube style sights such as the classic 30mm micro dots are extremely robust and have the longest battery life on the market. Holographic sights work differently, projecting a laser generated reticle, which allows large ring and dot reticles and better behavior for shooters with astigmatism, at the cost of shorter battery life.
How to Choose a Red Dot Sight by Dot Size
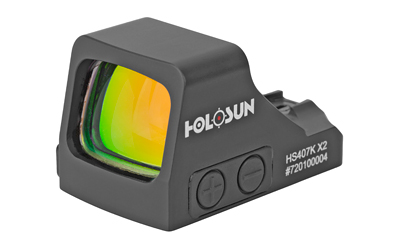
Dot size is quoted in MOA, or minutes of angle. One MOA subtends about 1.05 inches at 100 yards, so a 2 MOA dot covers roughly two inches of target at 100 yards and about a fifth of an inch at 10 yards. A 6 MOA dot covers six inches at 100 yards. That is the whole concept, and it is the part of how to choose a red dot sight that people overthink most.
Bigger dots are faster to find and easier to see in bright light, but they hide more of a distant target. Smaller dots are more precise and slower to pick up under stress. In practice, how to choose a red dot sight comes down to this:
- 2 MOA: the default for a rifle you shoot to 100 yards or beyond, and a good precision choice on a pistol.
- 3 to 4 MOA: the balanced middle ground and the most common pistol choice.
- 5 to 8 MOA: fast close range work, home defense, shotguns, and shooters with older eyes who want an obvious aiming point.
- Circle dot reticles: a large outer ring for speed with a small centre dot for precision. The best of both if you can live with the battery drain.
Astigmatism changes how to choose a red dot sight, because the dot may look like a starburst or comma rather than round. Before spending money, try to look through a friend’s optic. Some shooters find green reticles cleaner, and holographic sights are often easier to resolve.
Battery Type, Battery Life and Auto Wake
Power is the least glamorous part of how to choose a red dot sight and the part that strands people at the range. Battery life claims are always quoted at a specific brightness setting, usually a mid level daylight setting, so compare like with like.
A tube style micro dot such as the Aimpoint Micro T-2 is rated at 50,000 hours, more than five years, on a single CR2032 at setting 8, which is why those optics are designed to simply be left switched on. Trijicon rates its MRO in a similar five year range. Details for any given model are published on the manufacturer’s own specification sheets, for example at aimpoint.com.
Two practical features matter more than the headline number when you are working out how to choose a red dot sight:
- Motion activation. Marketed as Shake Awake or similar, this puts the optic to sleep when still and wakes it instantly when moved. Common on Holosun and many current models, and genuinely useful on a stored defensive gun.
- Battery tray position. A side or top loading tray lets you change the battery without removing the optic, so you keep your zero. A bottom loading tray means dismounting the sight and confirming zero afterwards. This is worth real money over the life of an optic.
Whichever you pick, write the installation date on the battery compartment with a marker and replace on schedule rather than waiting for the dot to die.
How to Choose a Red Dot Sight Mount and Height
Mounting is where the most avoidable mistakes happen. On a rifle, the standard interface is the MIL-STD-1913 Picatinny rail, and mount height is measured from the rail to the optical centreline. Three heights cover almost everything:
- 1.41 inch, absolute co-witness. Backup iron sights appear centred in the window, aligned with the dot.
- 1.5 to 1.6 inch, lower third co-witness. Irons sit in the bottom third of the window, leaving a cleaner view. The most popular general purpose choice.
- 1.93 inch, high mount. A taller, more heads up head position that many shooters find faster and more comfortable, and which works better with helmets and night vision.
On a pistol, how to choose a red dot sight mount comes down to the optic footprint: the pattern of screw holes and recoil lugs milled into the slide. RMR is the most widely supported full size pattern, RMSc is the slim pattern used on micro compacts, and ACRO uses its own four screw square pattern with an integral rail. Footprints are not interchangeable, so confirm your slide cut before you order. A direct milled slide sits lower and is more robust than an adapter plate.
Finally, torque the screws properly, because nothing about how to choose a red dot sight matters if the mount moves. Most mounts specify somewhere between 12 and 18 inch pounds; use a torque driver and the thread locker the maker recommends. Hand tightening with an Allen key is the leading cause of optics that will not hold zero. You can compare current mounts and optics in our online store, and if you are ordering a complete firearm alongside them our FFL transfer page covers the shipping side.
How to Choose a Red Dot Sight: Frequently Asked Questions
What distance should I zero a red dot at?
For a 5.56 carbine, a 50 yard zero is the most popular general purpose choice because the bullet stays within a few inches of the line of sight from the muzzle out to roughly 200 yards. A 36 yard zero produces a similar useful curve. For a defensive pistol, zero at 15 to 25 yards.
Do I still need iron sights?
They are cheap insurance. Folding backup irons cost little, weigh little and add nothing to your sight picture until you need them. On a pistol, suppressor height sights that co-witness through the optic window serve the same purpose.
Is an expensive red dot worth it?
Price is the last variable in how to choose a red dot sight: for a range or hunting gun, a well reviewed mid priced optic is plenty. For a defensive or duty gun, buy the most durable sight you can afford, because failures happen through recoil, impact and water intrusion rather than through the glass being slightly clearer.
Work through it in that order and how to choose a red dot sight stops being a guessing game: pick the dot size for your distance, the battery life you can live with, the footprint your gun accepts, and the mount height that puts the dot where your eye already is. Browse our optics selection when you are ready to commit.
Shop what you just read about
Ammunition, optics, parts and gear, shipped to all 50 states. Firearms transfer through your local dealer.
Browse the inventoryKeep reading
The Thermal Spec Sheet, Decoded: What Each Line Means and What It Costs
Every thermal optic comes with the same wall of numbers. 384×288. 12 micron. Under 25mK. 50Hz. 1,800 yards. Most buyers…
Read more ›
How to Choose a Rifle Scope: Magnification, Focal Plane and Mounts
Most people shopping for their first serious optic make the same two mistakes. They buy more magnification than the rifle…
Read more ›
Red Dot vs LPVO: Which Optic Should You Run?
A red dot is faster up close and simpler; an LPVO reaches out to distance. Here is how to choose…
Read more ›